
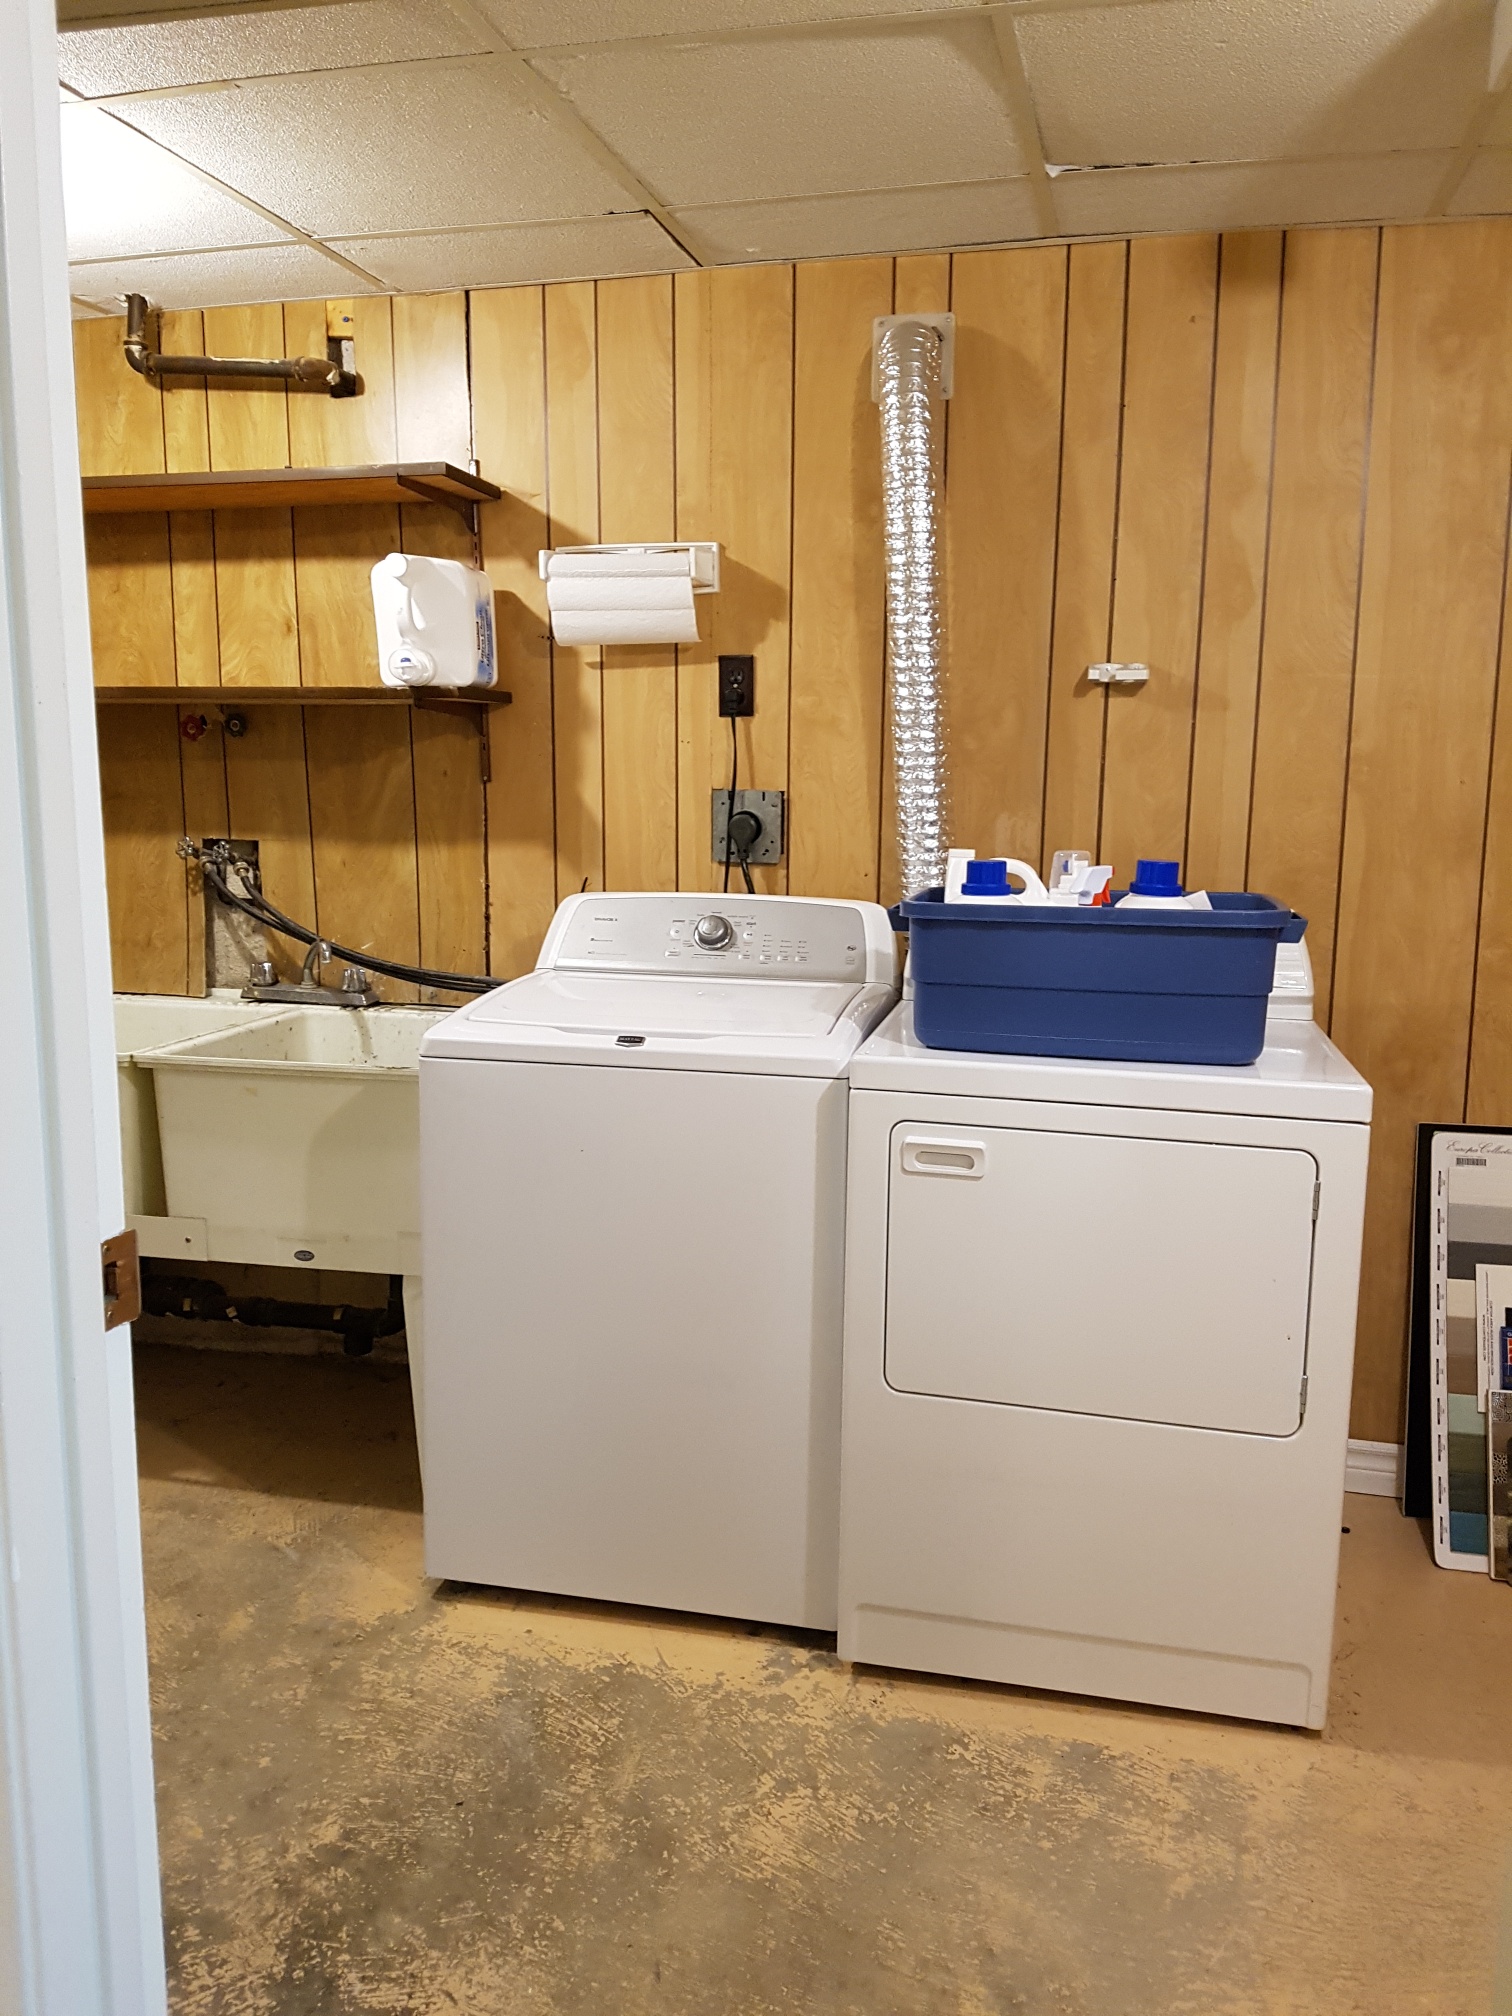
Before
Never underestimate the power of a well-designed laundry room to transform your lifestyle. It’s one of the most practical areas of the home, and one that you can’t avoid. A true laundry room (as opposed to a closet for stacked washer and dryer in a condo) offers space for washing and drying clothes, potting plants, cleaning paint brushes, and storage of those items that just don’t belong anywhere else in the home. Unfortunately, it’s a room that is usually neglected and left in a state that belies its importance in our lives. That certainly describes the room I used to call my laundry room, as you can see in the Before photo below.
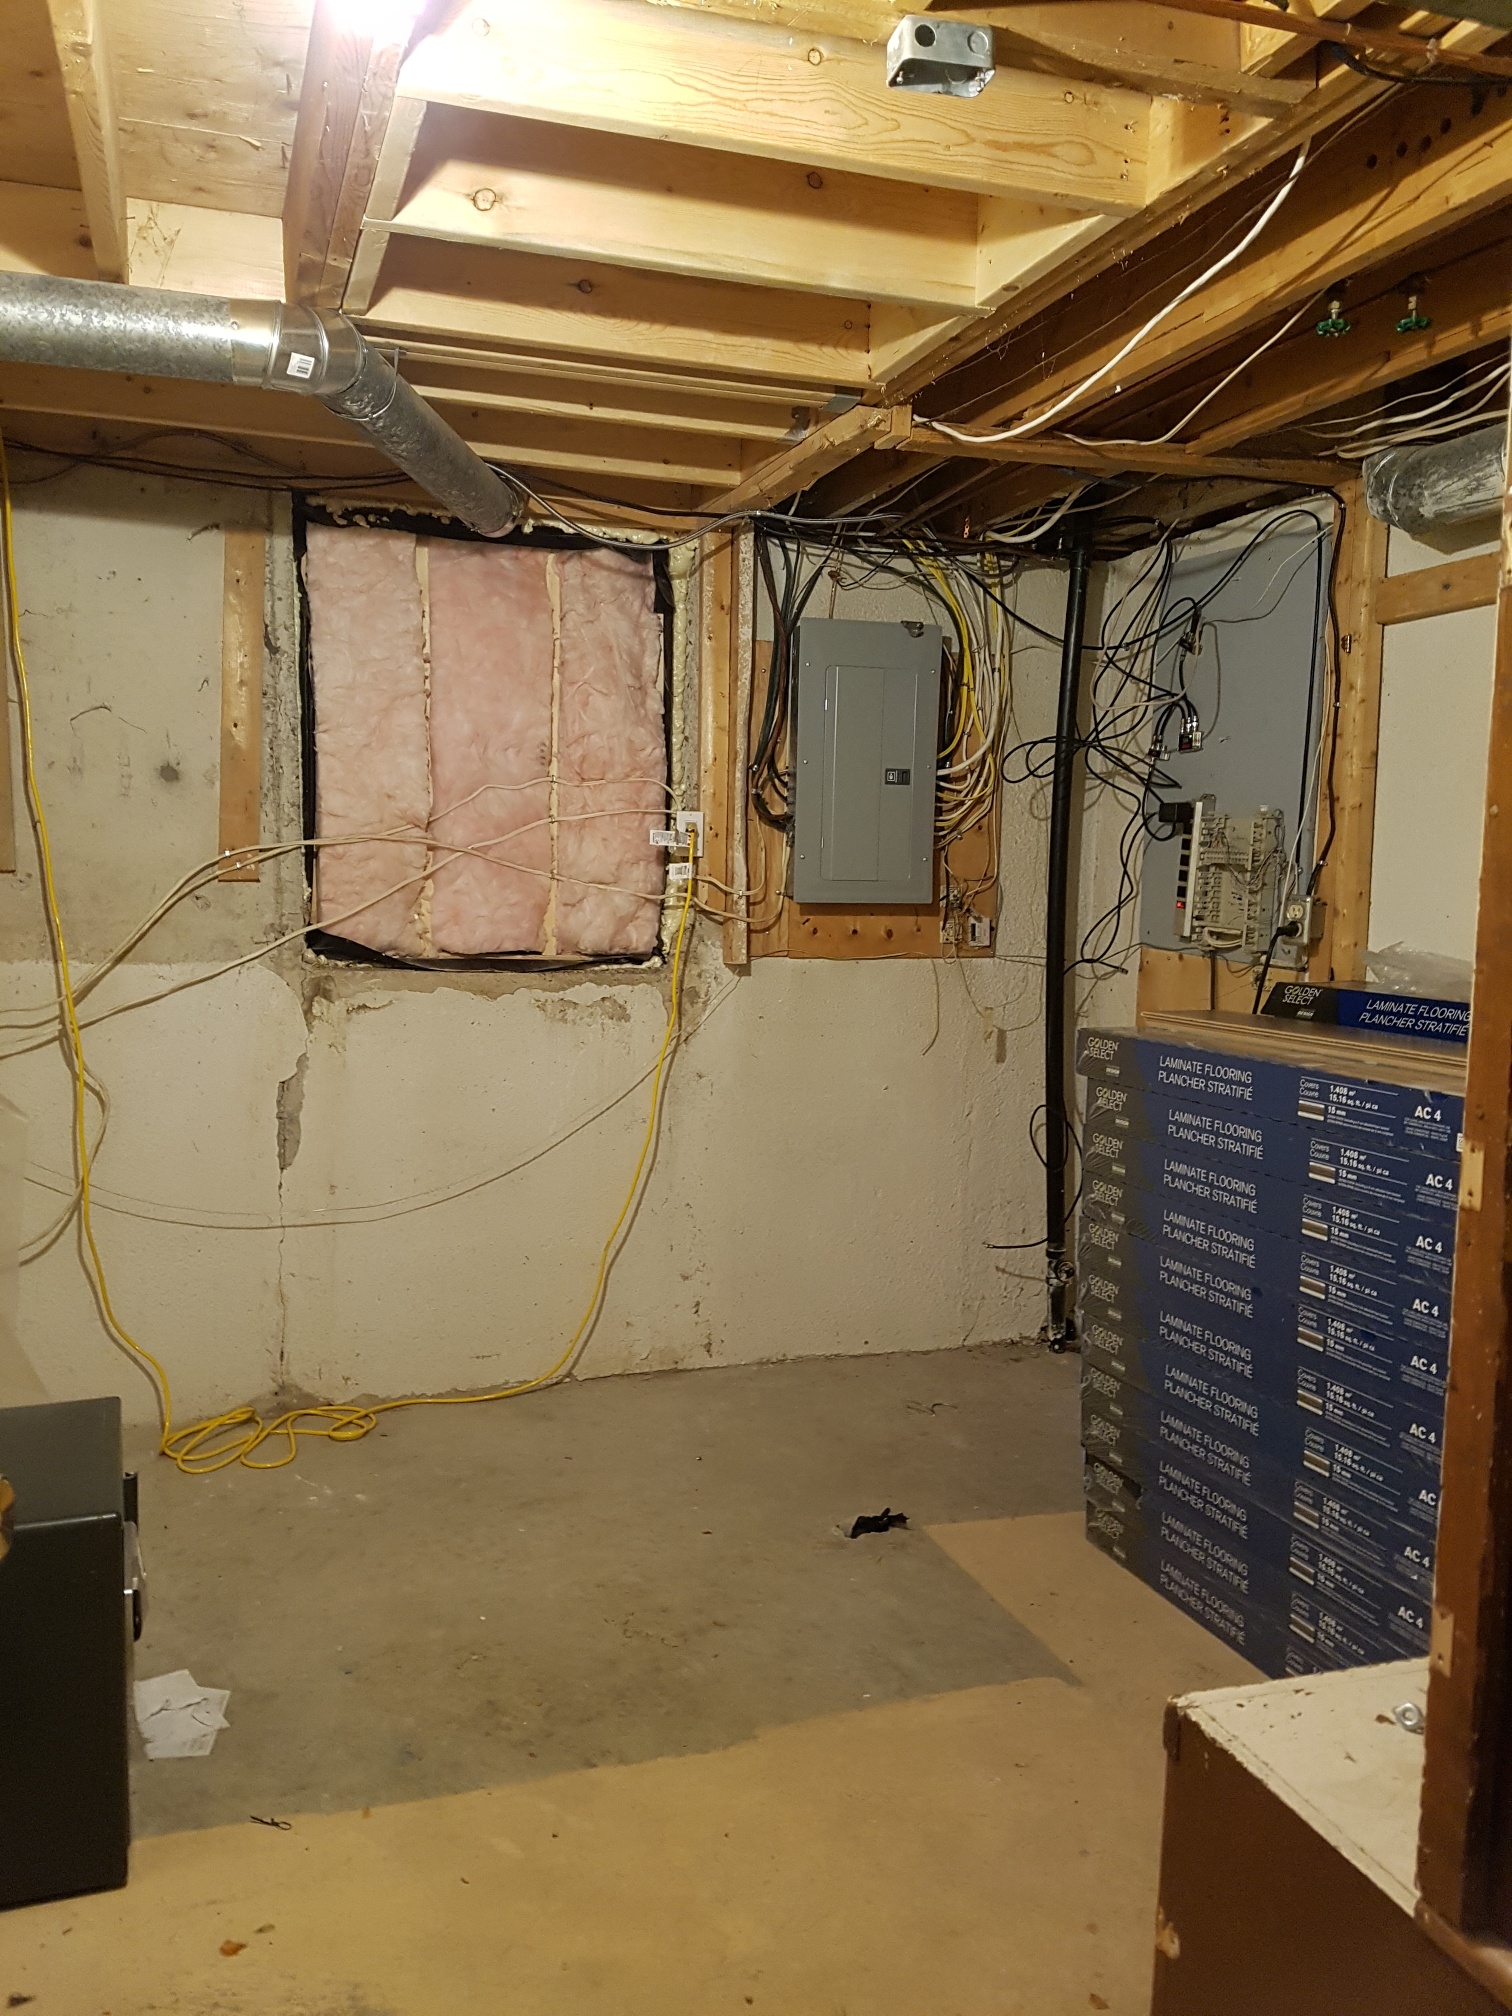
Our laundry room makeover was part of a larger basement renovation, in which we moved the furnace, water heater and laundry to the other side of the basement. Our new laundry room is now in the space that we used to call our ‘utility room’. It was dimly lit, and even less finished than the old laundry room, as you can see in the Before photo below.
During
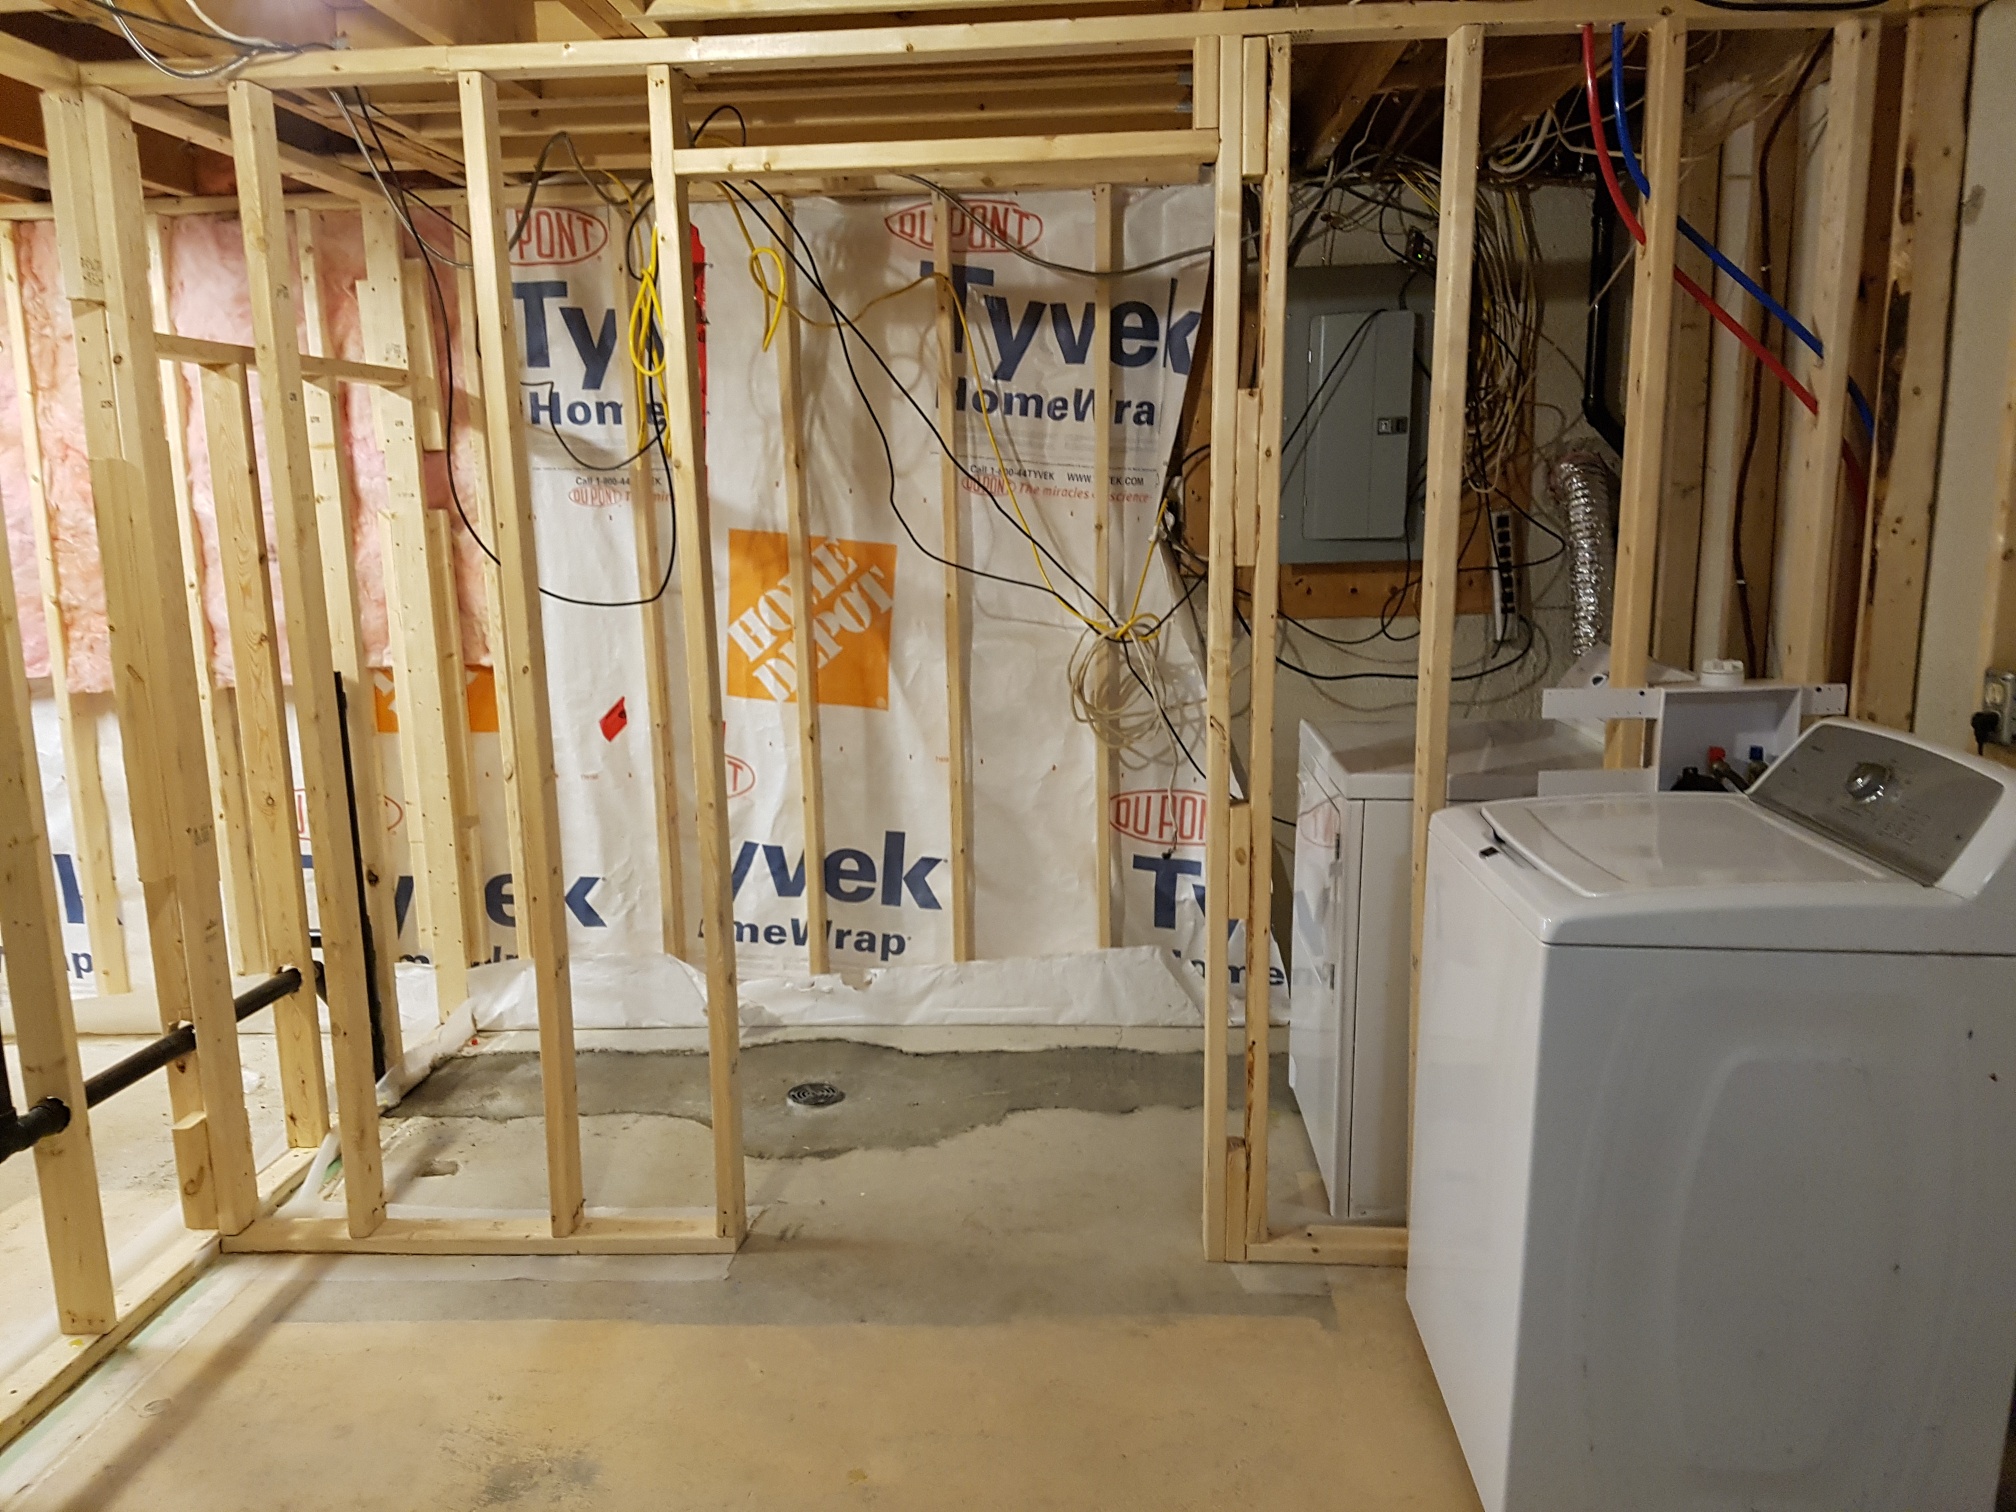
During this home renovation, we needed to continue to do laundry. We were able to leave the old washer and dryer in their old position for the first 2 weeks, while the crew worked around them. After that, they prepared the plumbing and venting hookups in the new position, and moved the machines over. Unfortunately, they had to move them out to the garage at one stage. They diligently brought them back in every Friday so that we could do our laundry over the weekends, then back out to the garage they would go on Monday.
The Plan
Our new laundry room started with a floor plan. First we had to accommodate the new furnace, tankless water heater and electrical panel along the outside wall. We closed that area off, which left us with the laundry room.
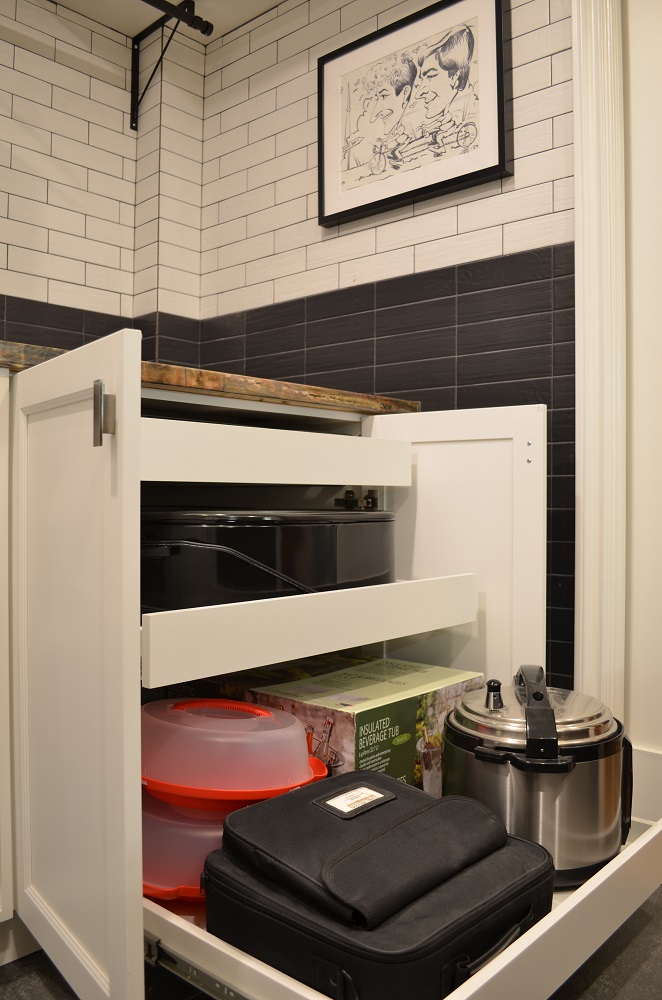
I designed one wall around cabinets we had picked up at our local Habitat for Humanity Restore. On the opposite wall, I had originally planned for the washer and dryer to be on the floor, with a countertop above. In the end, I opted to stack the washer and dryer, to allow for a new custom cabinet. That cabinet is the full depth of my machines — 36″ — and holds a ton of stuff that never really fit anywhere else.
After
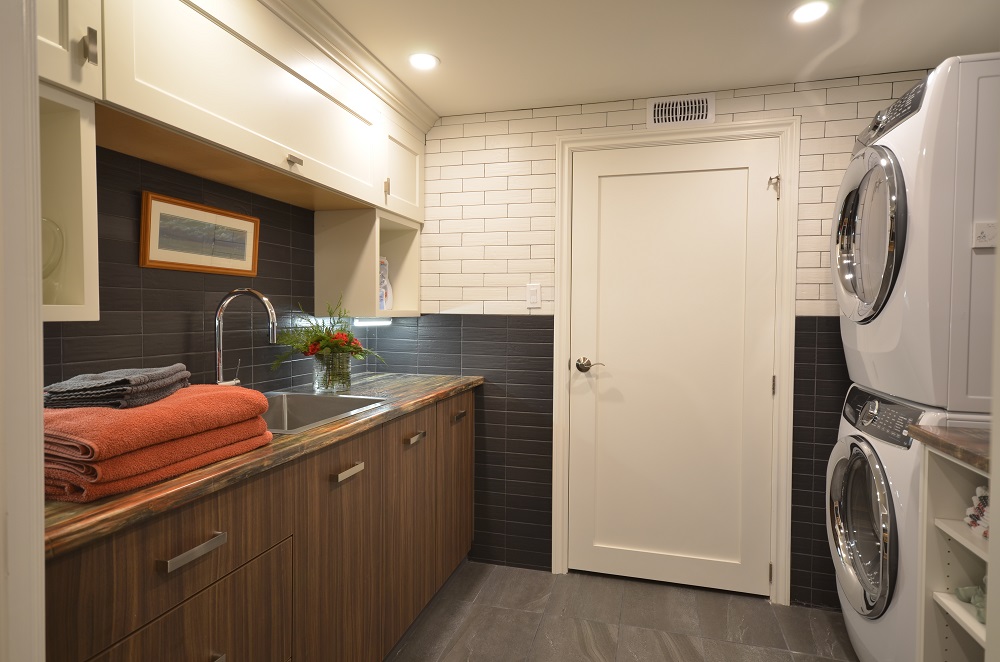
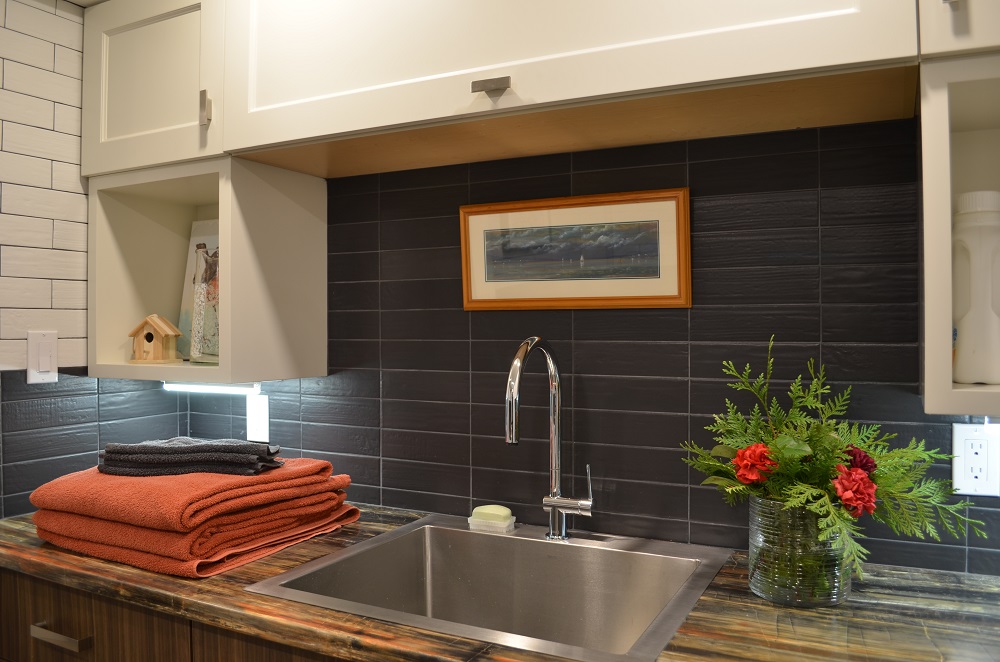
Once the floor plan had been decided, it was time to choose finishes that would coordinate with our Restore cabinets. Although the lowers are brown laminate, we didn’t want a brown room. We decided on charcoal and white, instead, using the brown to warm things up. Porcelain floor tiles are 12″x24″ with white veining and a matte finish. They hide everything!
On the lower half of the walls, we went with matte black 2.5″ x 9″ tiles, in stacked formation like the floors. Above countertop height, we used the same tiles in white, with black grout to highlight the staggered formation. The white tiles and upper cabinets, along with ample lighting, helped to ensure that the room would never feel dark.
A laminate countertop from Formica pulls together the black, brown and white, with rusty highlights. It’s an inexpensive and practical choice that wears like iron and doesn’t show any messes.

Jeanne Grier is an award-winning interior decorator and owner of Stylish Fireplaces & Interiors. With over 25 years’ experience in the Toronto area, she has completed hundreds of makeovers. Her expertise extends to fireplaces, and she is an NFI Certified Hearth Design Specialist. She and her husband Colin operate a retail showroom in the Toronto area, featuring over 50 electric fireplaces, as well as wall coverings and fireplace accessories.